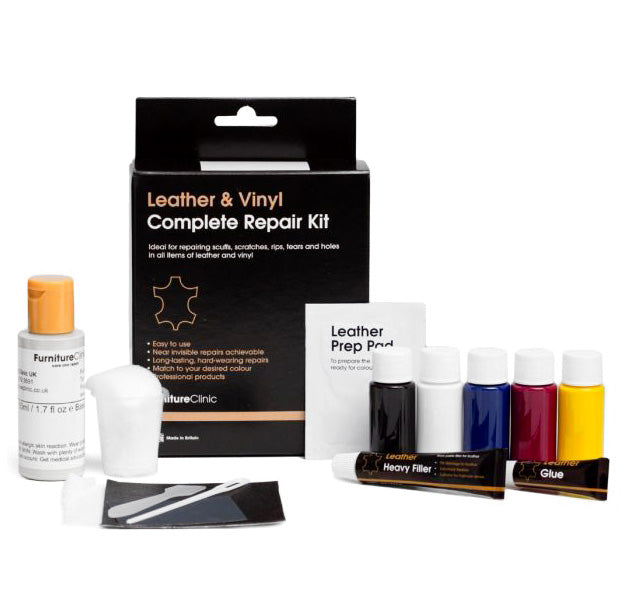
By repairing the tear in the leather sofa below, we will show you how to repair a tear/hole in leather. What is needed for a nice repair is the Leather Specialist's leather repair kit , as well as Leather color and Surface finish , alt. Small kit for dyeing leather. The products are at the bottom of the page, or under the respective category on the left.
Always start by cleaning the leather properly. The products used to repair and dye leather do not adhere well to dirt, old wax, etc. If there is a large area to be dyed after the repair, you also need to clean the leather surface with Leather Prep (does not apply to aniline and semi-aniline) and Alcohol Cleaner . This is not necessary if only a small area is to be dyed afterwards.
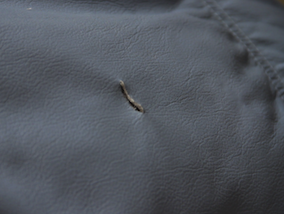
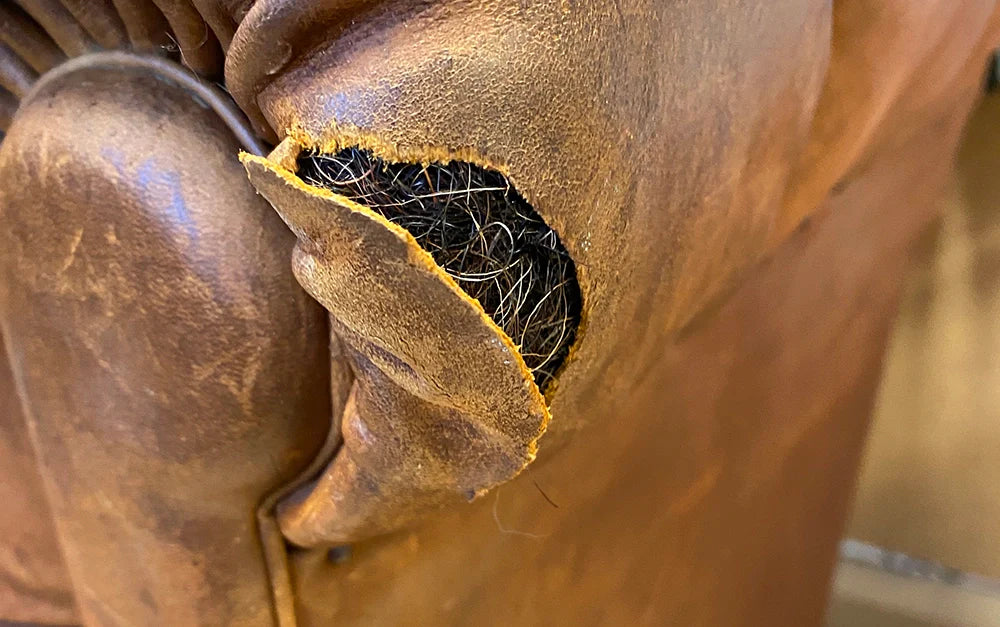
This is what the sofa cushion looks like before the repair. It has a tear in the middle, and if the leather is repaired there is a high risk that the hole will enlarge further.
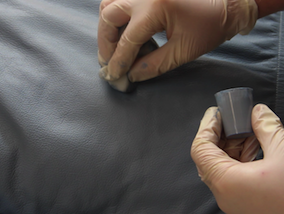
Step 1: Use a scalpel or really sharp scissors to trim the edges of the tear. This will remove the “fuzz” and get sharper edges, which means the repair will be better.

Step 2: Cut a reinforcement cloth to the right size. It should cover an area of about 2 cm around the hole in the leather. Use tweezers or putty knife/palette knife to insert the reinforcement fabric under the leather, so that it is evenly distributed under the hole.
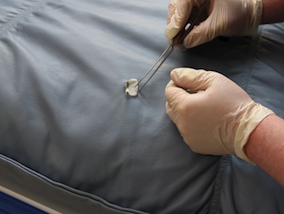
To make it easier to get the cloth in the right place, you can put a line in the middle of the cloth with a marker pen. When the cloth is in the right place, the line will be visible in the middle of the hole. Make sure that the reinforcement cloth does not fold or curl, it must lie completely flat against the underside of the leather.
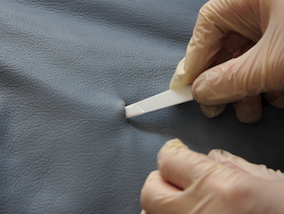
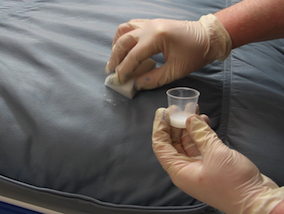
Step 3: Using the palette knife, apply leather glue between the underside of the leather and the reinforcement fabric. Apply a small amount of leather glue to the top of the palette knife, gently press on one side of the tear, and gently insert the knife between the leather and the reinforcement fabric. While pressing on the opposite side, hold the reinforcement fabric in place, but be careful not to move or crease the fabric. Press the spatula against the underside of the leather and pull it out so that the glue sticks to the underside of the leather. Repeat around the entire tear. Once this is done, gently press the leather so that it is pressed against the reinforcement fabric. Make sure it is even and that, if it is a tear and not a hole, the tear closes tightly. Let dry before moving on to the next step.
This is basically the most important step in the entire leather repair. The reinforcement fabric prevents the hole from opening again if the surrounding leather is subjected to stress, e.g. if someone kneels next to the hole.
Step 4: Add leather filler to the tear/hole. The filler fills in and creates a smooth surface. First apply one layer, being careful to only apply the filler to the tear/hole. If you also fill in the surrounding structure, you will get a smoother surface around the hole in the leather that will easily catch the eye. Let the leather filler dry, you can speed up the drying process with a hairdryer.
Since the leather putty is water-based, it will sink slightly as it dries. This step will need to be repeated in several thin layers until the tear/hole is completely level with the surrounding leather. Allow the putty to dry between each layer.
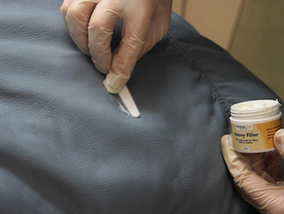
If the surface is not completely smooth after the last layer of filler has been applied, you can gently sand the surface with fine sandpaper . Make sure the leather filler is dry before sanding.
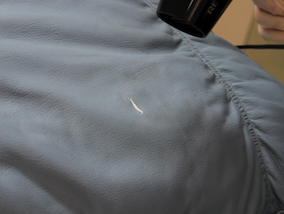
Step 5: Paint the repair with leather paint. When the putty is completely dry, make sure that any sanding residue is thoroughly wiped off. Then, take leather paint on a sponge and gently dab it over the repaired damage and the surrounding area, so that it blends into the surrounding leather. Let dry (you can speed up the drying process with a hairdryer), apply additional layers of leather paint until you are satisfied with the result.
Step 6: Once the leather is dyed to provide adequate coverage and has dried properly, it is time for the final step in the repair; applying the Leather Finish. This is done in the same way as with the leather dye in step 5, using a sponge (of course, you can also apply both dye and finish with an airbrush if available).
Apply 2-3 coats of surface finish on top of the leather dye to seal the dye and ensure a durable surface with the right shine. Allow to dry between each coat, the drying process can be sped up with a hairdryer. Adding hardener Cross Linker Eco to the surface finish will further increase durability. A tip is to sand the entire dyed surface after the first coat of finish has dried. Wipe off the sanding dust and apply one or two more coats of finish. Sanding removes any roughness that may have occurred during dyeing, as well as dust particles and other things that have stuck to the leather dye, and you get a smooth and soft surface finish.
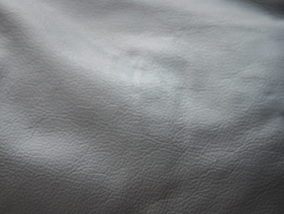
Done!